#mardibosch
MARDI GRAS 2017
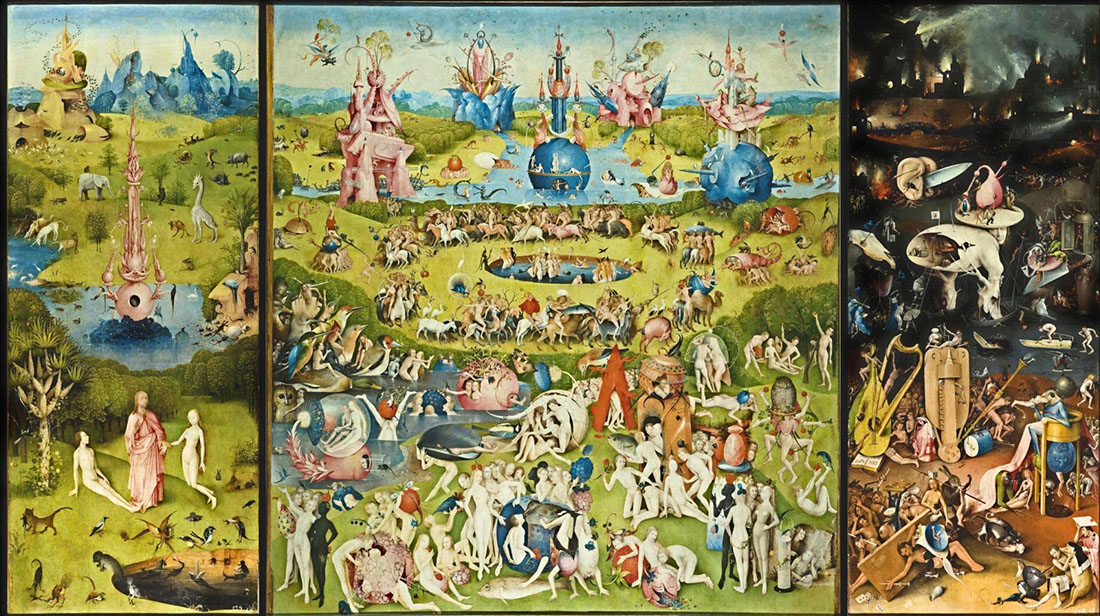
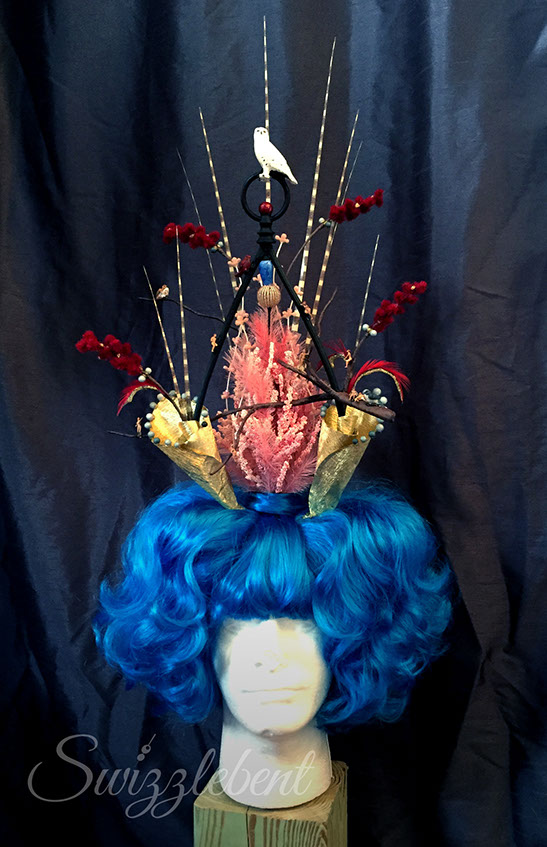
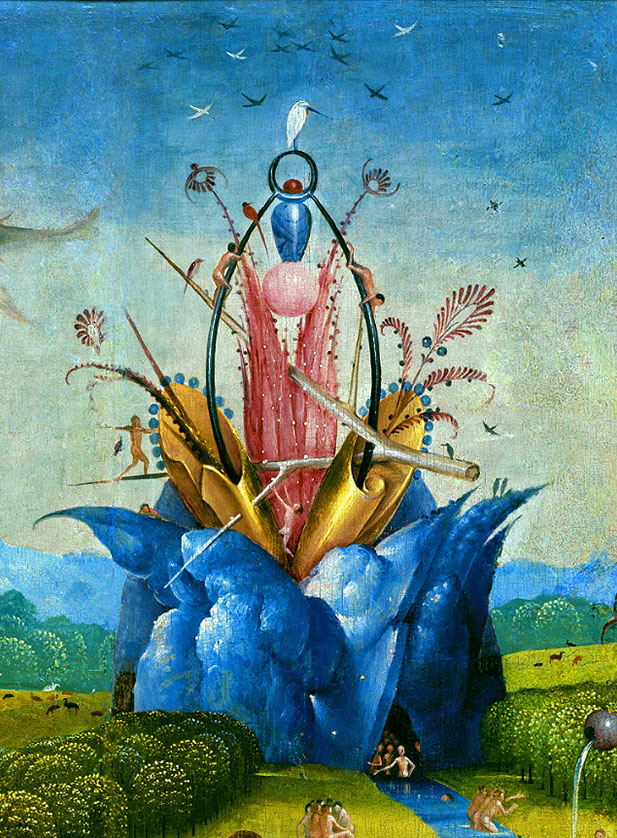
The Garden of Earthly Delights

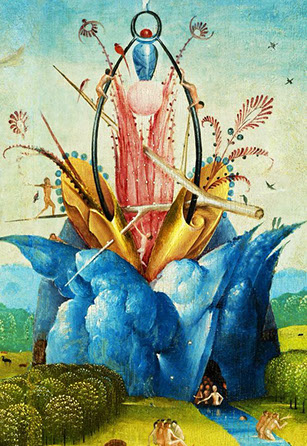
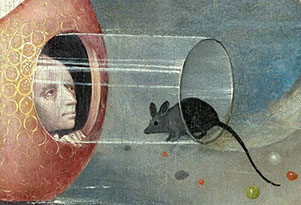

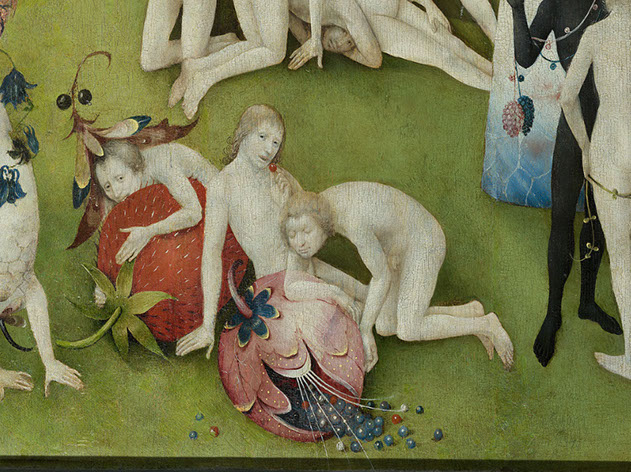
Details from The Garden of Earthly Delights
She called an audible.
It's been five years since my last elaborate costume endeavor. Until a couple weeks ago I had no plans for a grand 2017 masquerade. Then out of nowhere one morning at work, the costume muse struck with a vengeance. Her decree: a new costume based on Bosch's The Garden of Earthly Delights. And so, with 28 days until Mardi Gras, here we are. And here we go...
16th Century Inspiration
There are scholars who devote their entire careers to the study of this single painting so I won't go into much detail, but here's a primer, courtesy of Wikipedia: The Garden of Earthly Delights is the modern title given to a triptych painted by the Early Netherlandish master Hieronymus Bosch. It dates from between 1490 and 1510, when Bosch was between about 40 and 60 years old, and is his best-known and most ambitious surviving work. Art historians frequently interpret the painting as a didactic warning on the perils of life's temptations. The left panel depicts God presenting Eve to Adam, the central panel is a broad panorama of socially engaged nude figures, fantastical animals, and oversized fruit. The right panel is a hellscape and portrays the torments of damnation.
That's the boring stuff. All you really need to know is that it's my single favorite painting of all time. It's rife with sex and overflowing with symbolism and so dense with detail that it's overwhelming. The center panel depicts a fantastical bacchanal, full of all the sensual pleasures a human could dream up (and plenty that you probably never have), and it seems to me that there could be no better inspiration for a Mardi Gras costume than this. Plus, when you do a Google search for "Hieronymus Bosch costume," NOTHING comes up. That's quite a feat in the Pinterest era when pretty much anybody with an Instagram and a hot glue gun considers themselves "a serious cosplayer."
Anyway, if you're even the tiniest bit curious about this painting, do yourself a favor and check out this guided tour. You can zoom in and out to the tiniest detail and explore the whole work (even the outer panels) and get a pretty good grasp of the symbolism at play, as well as some interesting tidbits on life and love in the 1500s. (Make sure you visit from a desktop. though, as the site will gobble up your whole monthly data package in a single sitting.)
<<< #blessed
January 28, 2017 If the success of today's 9-hour thrift-store-scour/bargain-safari/coupon-jujitsu marathon is any indication, the Costume Gods have most certainly blessed this year's masquerade endeavor. Exhibit A: This wonderfully weird and entirely WTF $1.50 ring from Bridge House. A few pieces were so meant-to-be that at one point I literally tripped over the perfect bolero jacket. Photos from the thrift haul to come.
A Head Start >>>
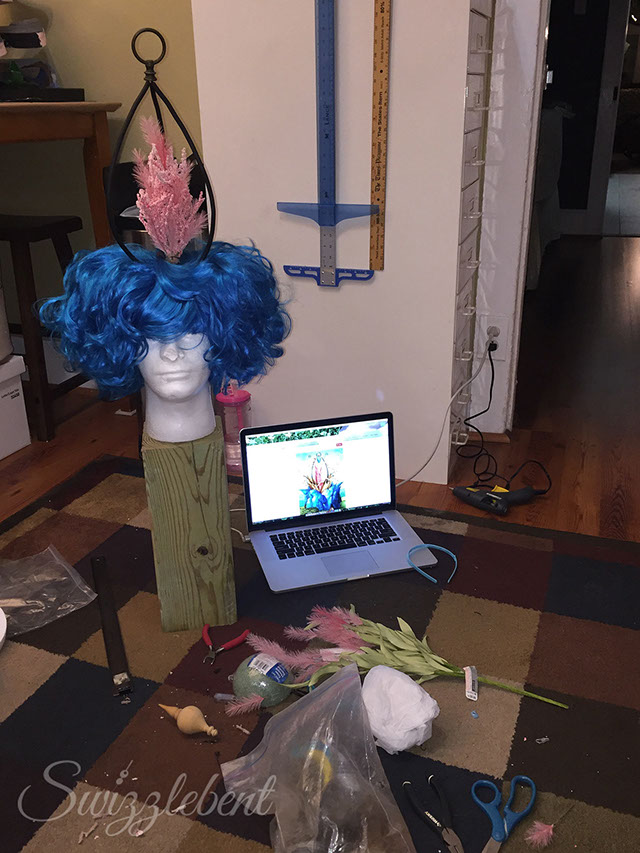
January 29, 2017 Before you make the sausage, you gotta kill the pig. That is to say, sometimes you have to build a thing to use to build the other thing. To make the head piece, I was going to need a head that wasn't attached to my own shoulders. So that's how we spent Sunday morning.
<<< The costume of a million sequins...
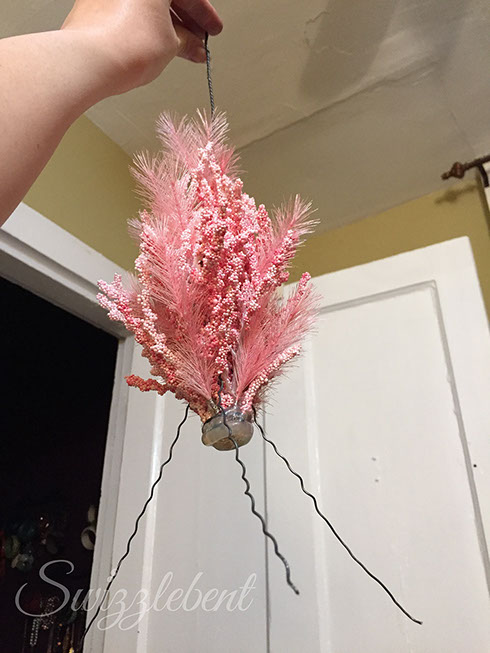
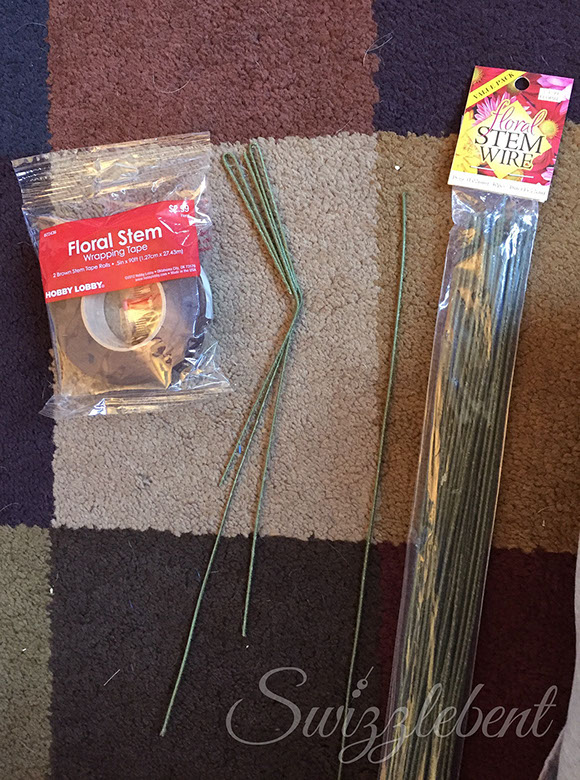
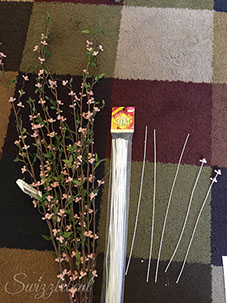
January 29, 2017 ...begins with a single stick of hot glue. Also, a basket full of clearance-priced silk florals and 50 feet of rusty annealed wire leftover from art school. (Not pictured: Wire twisting blisters.)
I thought I'd have more done by Sunday night, but we also went for two long walks and enjoyed an apple cider mimosa on the porch while admiring the sunset, so no regrets.


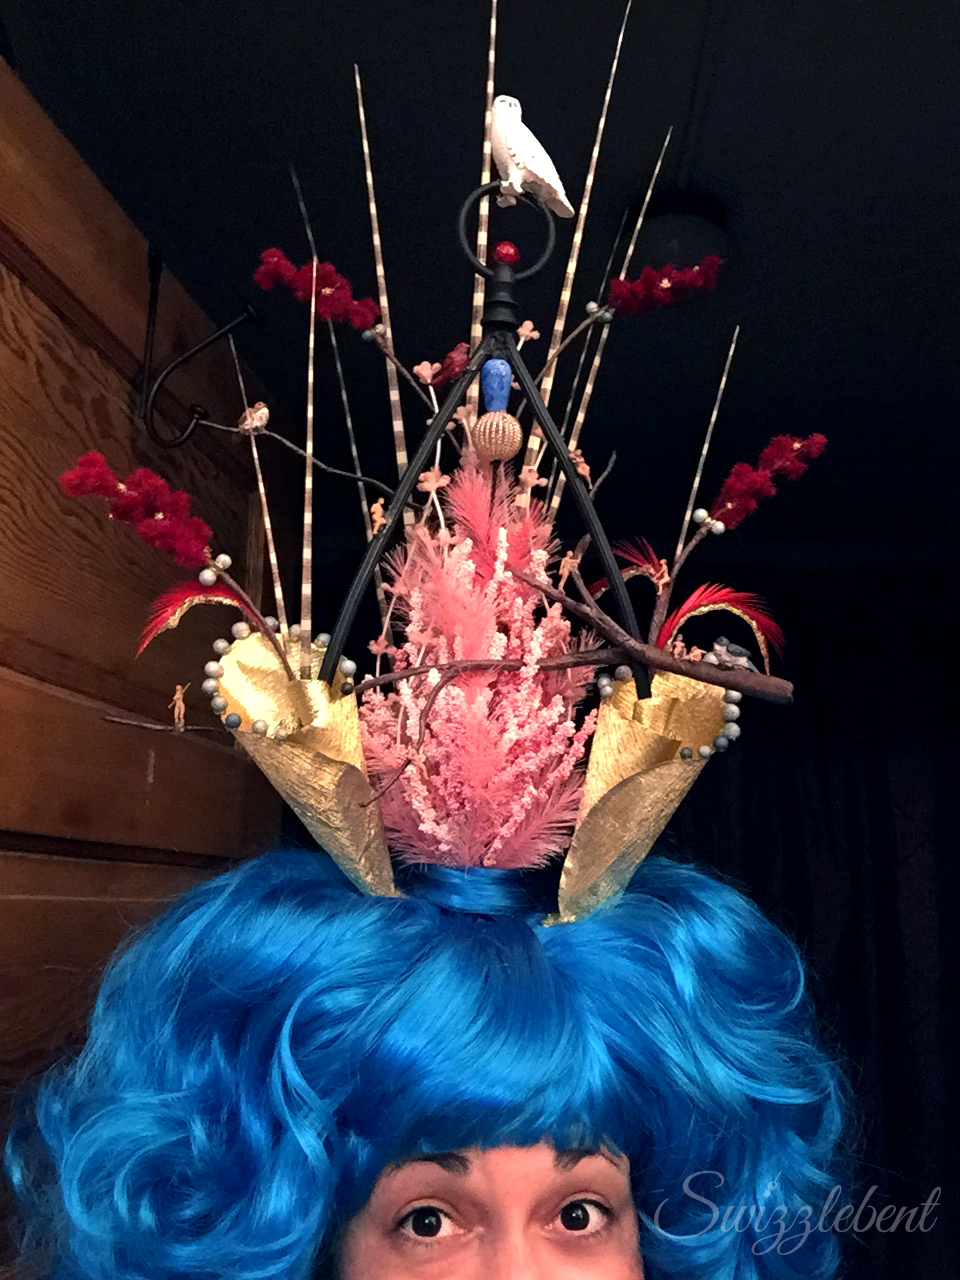
Voila!
February 10, 2017 Done! Voila. Easy as pie. Just kidding. It took two weeks of daily/nightly glue gun and wire twisting soirées to get here.
So here's how it happened:
<<<
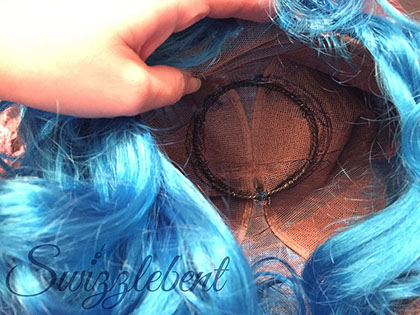
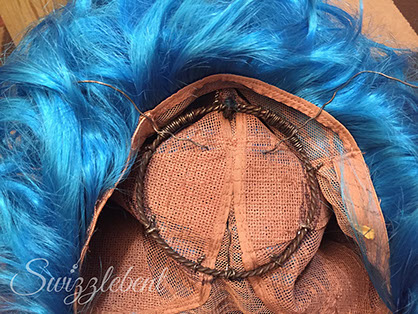
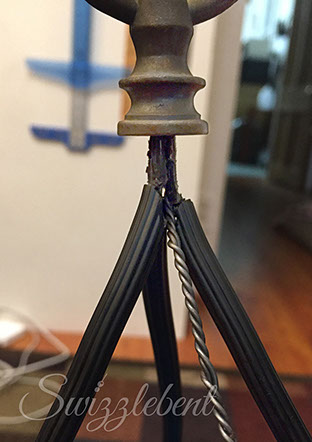
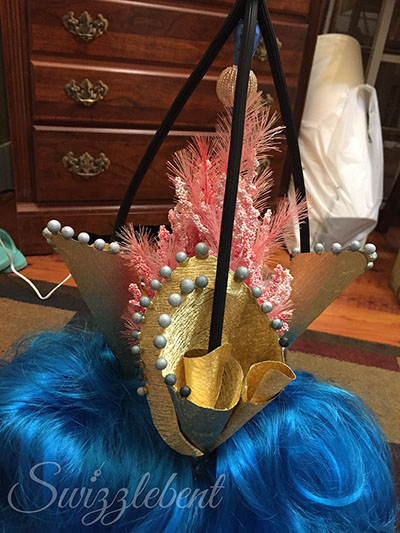
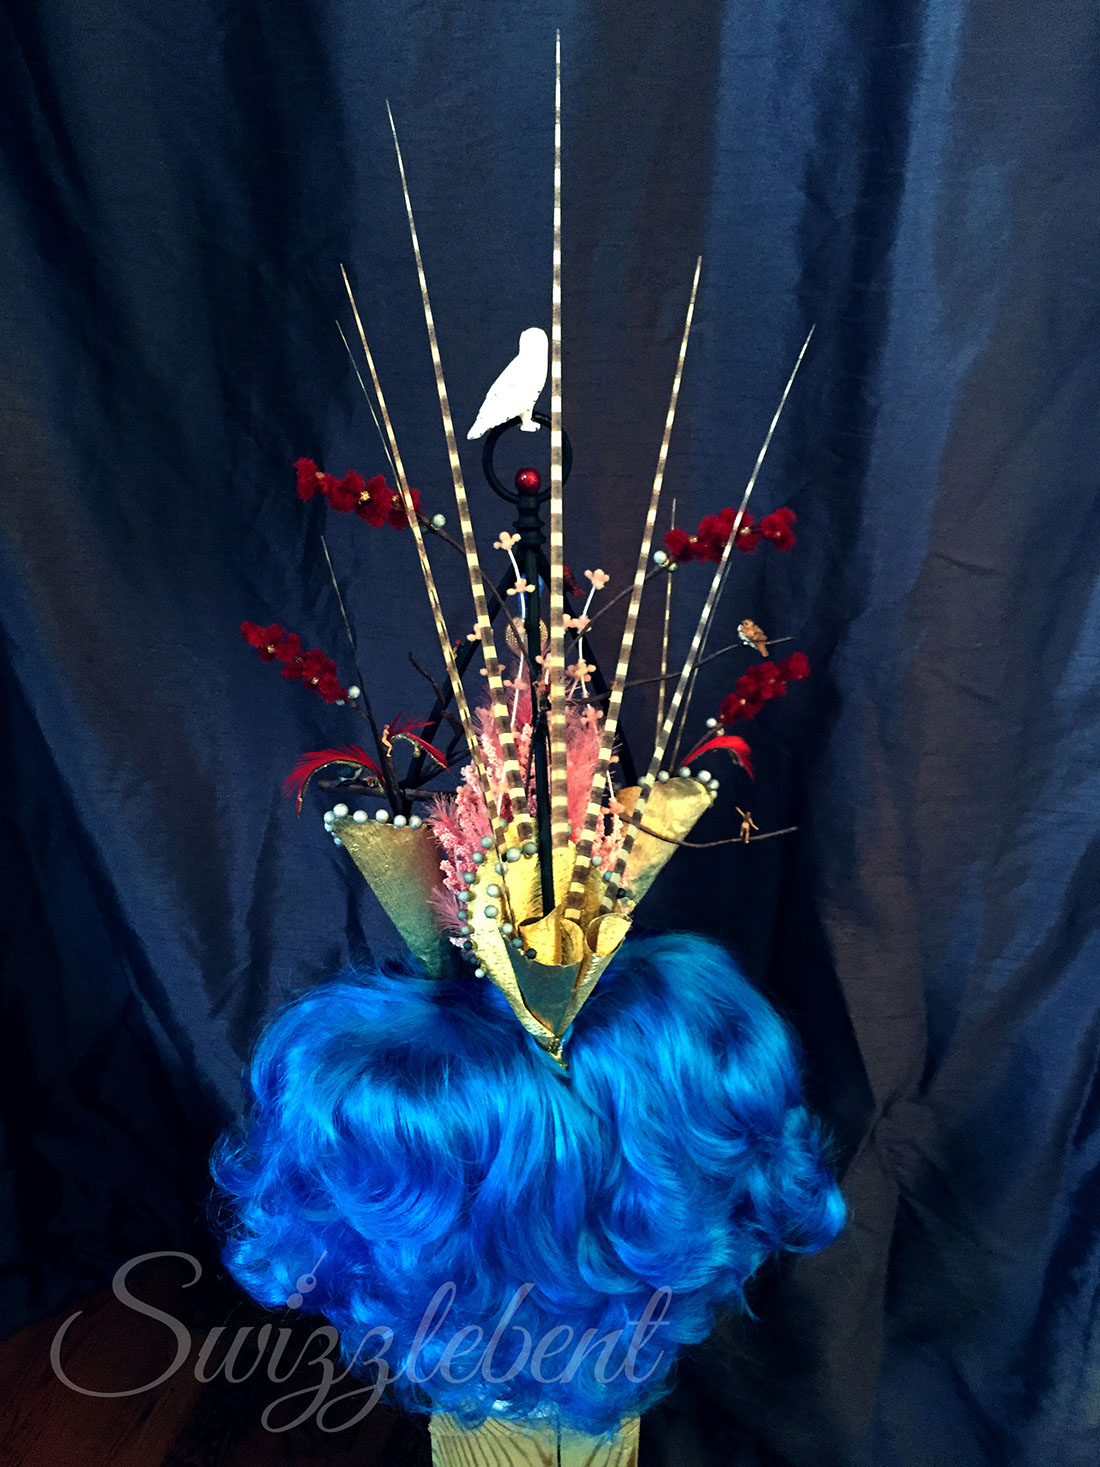
To give everything a solid base, I started off with a 4" crown made from four lengths of 16 gauge wire twisted together, then attached that to the inside of the wig by sewing it in with single lengths of 22 gauge wire.
>>>
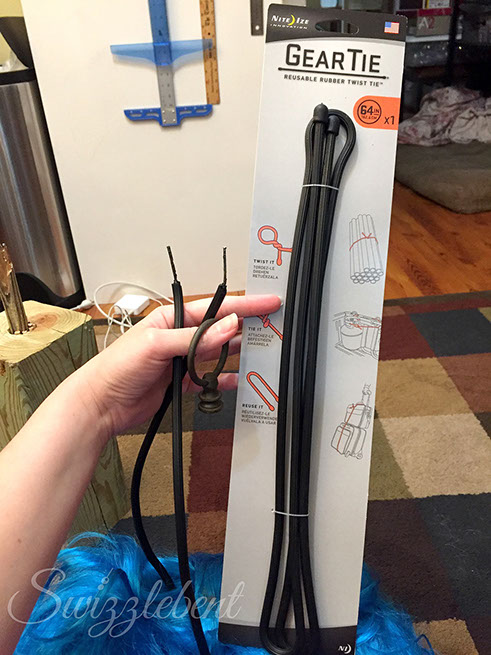
After trying and failing with a few other materials first, I formed the cage out of the biggest GearTie available. After stripping the rubber from the ends of the pieces, I was able to stick them through the wig and wrap them onto the wire base as well.
<<< >>>
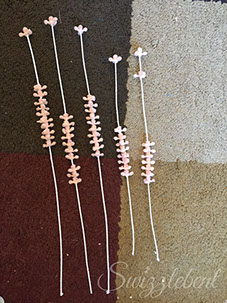
Twisted together three lengths of 16 gauge wire and stuck it through the flower center, then fanned out the ends, stuck them through the wig, and attached them to the wire base.
<<<
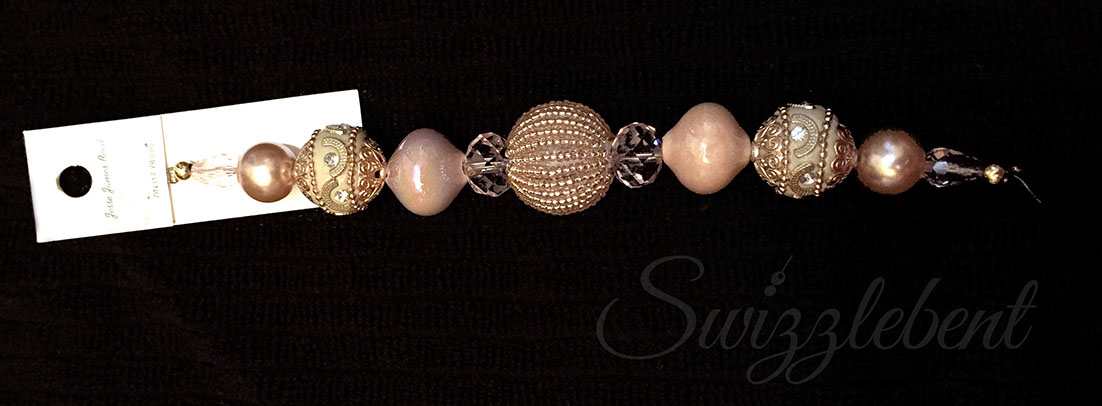
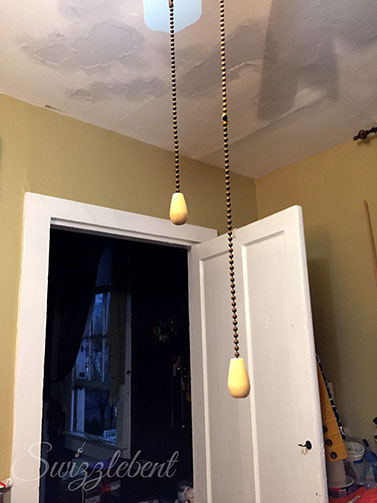
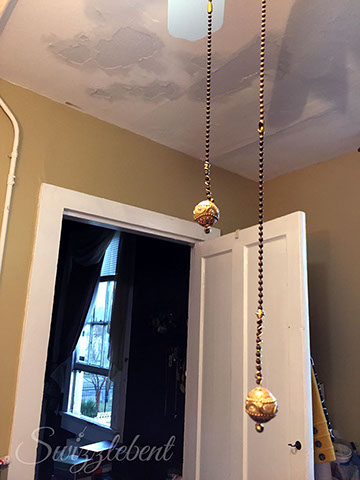
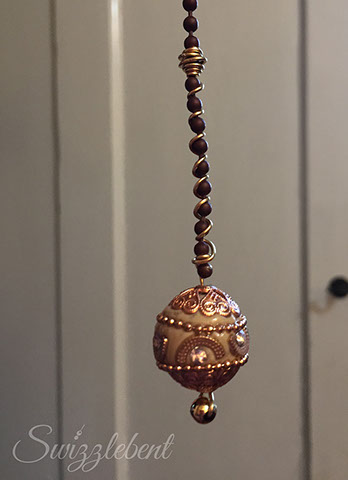
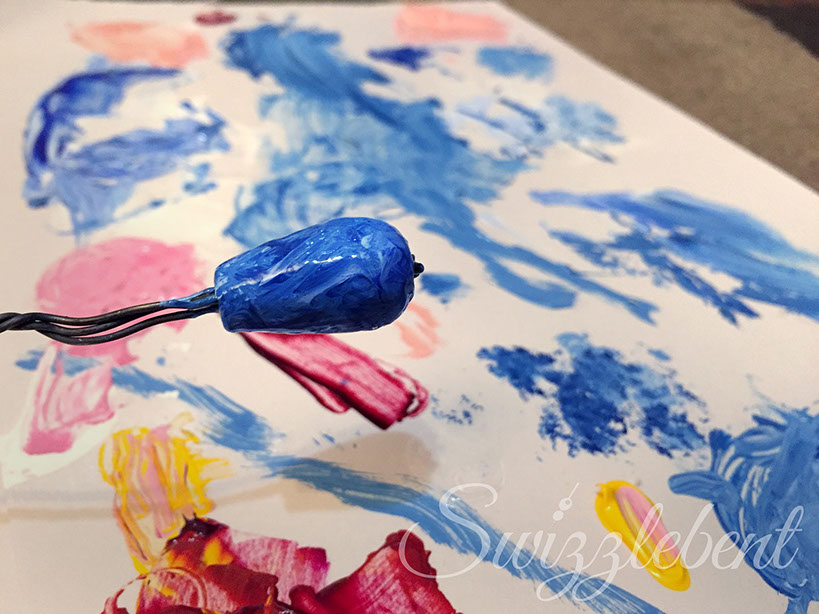
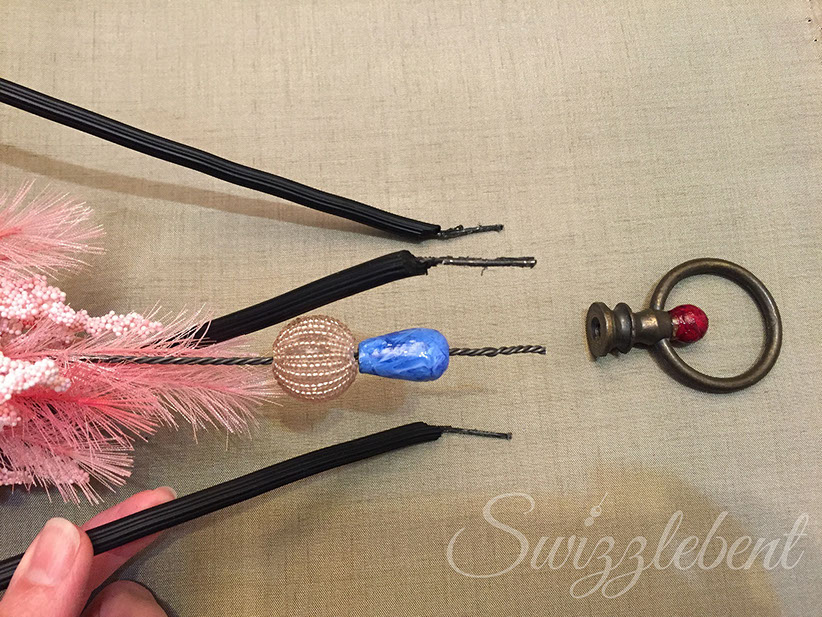
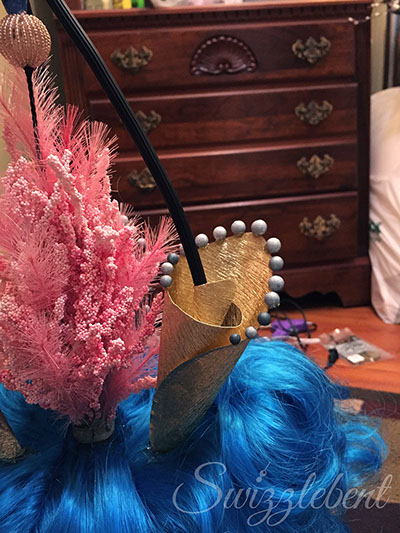
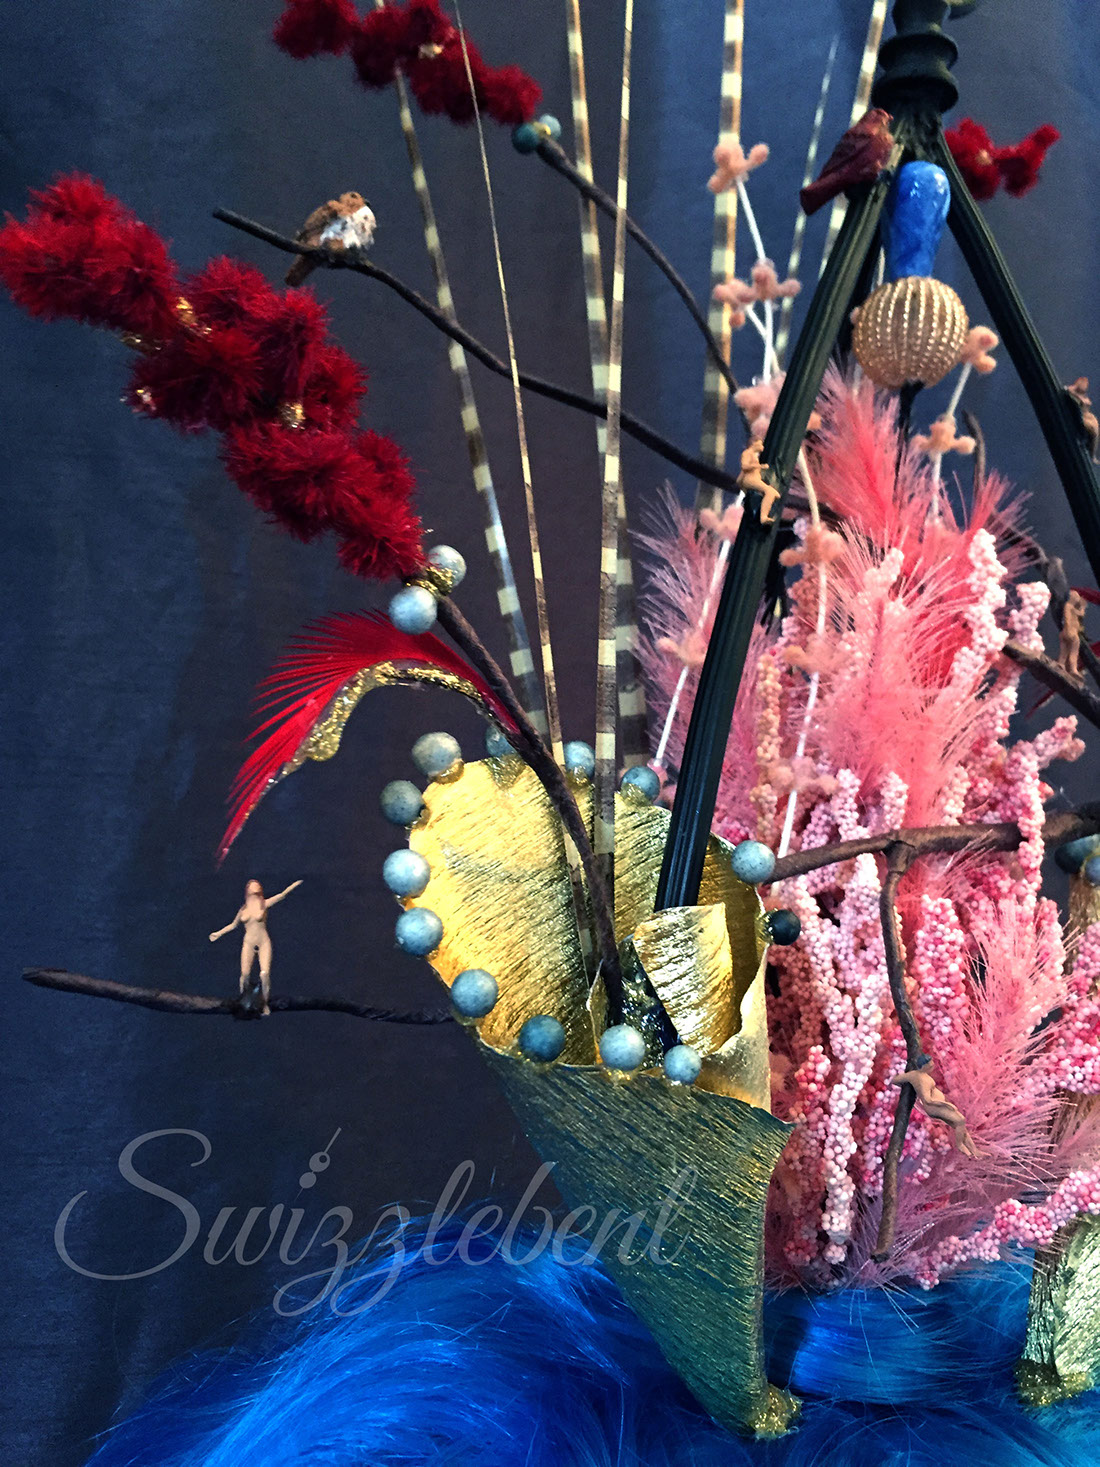
I spent two full days hunting for the right beads. I found the perfect pink one in no time (in the center on the string above) but what I needed for the blue one just wasn't out there. I thought I might have to carve it from foam, but as I was sitting on the floor back in my work room trying to figure out an alternative I got hot, and I got up to turn on the fan, and when I put my hand on the pull chain a light bulb went off: I had pulled the wrong chain. But at the same moment I also realized that the hideous yellowed plastic baubles that have been hanging there since sometime in the mid-1980s were exactly what I needed. So I took them down cleaned off 30 years of grime, and painted them. I also used the extra beads that accompanied the perfect pink one to make some new and far less gross custom pull chains for the fan.
Once the blue paint and a few extra layers of gloss sealant were dry, I strung the beads on the center wire and glued them inside a copper lamp finial that I picked up at a thrift store for $1.
>>>
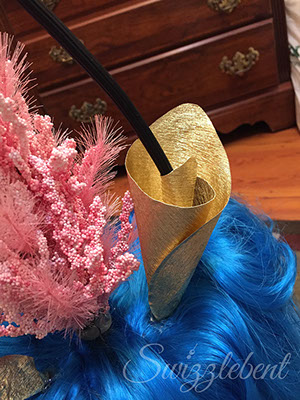
For the "horns," I used two sheets of bright gold fabric-like scrapbooking paper, glued back-to-back with rubber cement. The stuff is pretty sturdy and easy to shape, and since it already has so much texture it's very forgiving if you accidentally wrinkle it in the shaping process.
I hate —HATE— glitter, but glitter contained in hot glue can't spread and infect every object you own, so it isn't so bad. I used a low-temp heat gun to attach individual blue foam berries from a floral stem to the edges of the gold paper.
>>>
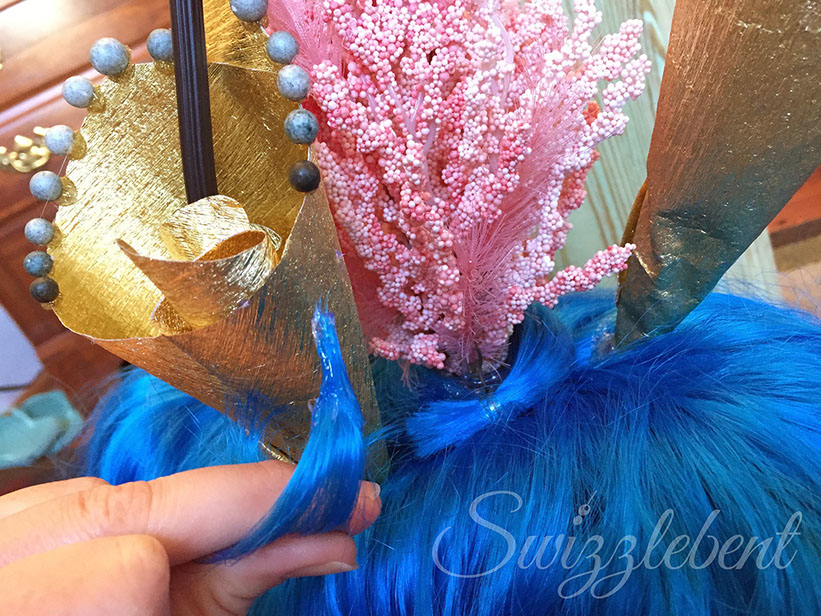
When I first bought the wig, the bangs were WAY too heavy, so I trimmed a pretty big chunk of them off at the scalp and kept the hair on a hunch that I might need it for something down the line. After the "horns" were in place, I wrapped the trimmed hair around the base of the flower center to hide the three sticks of hot glue and rusty wire prongs holding the whole thing together.

<<<
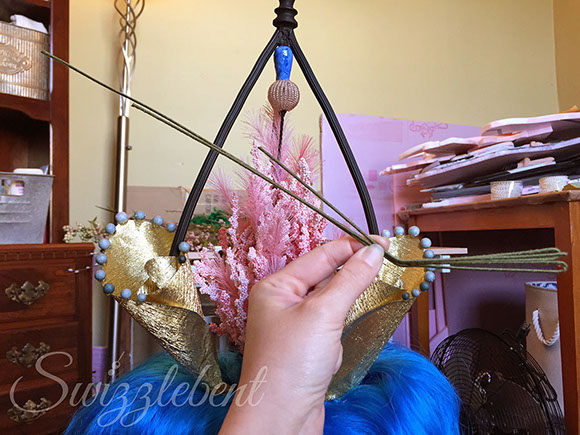
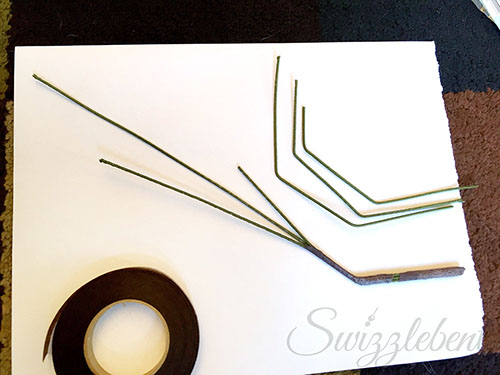
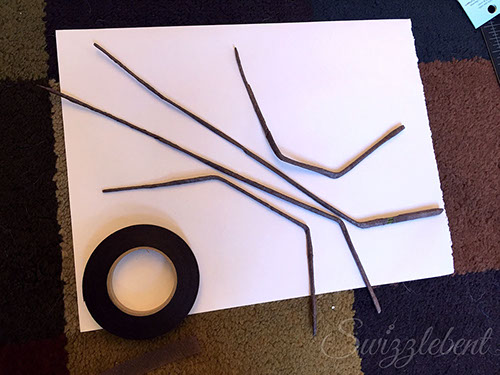
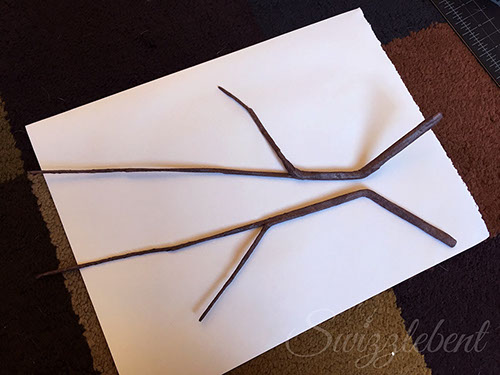
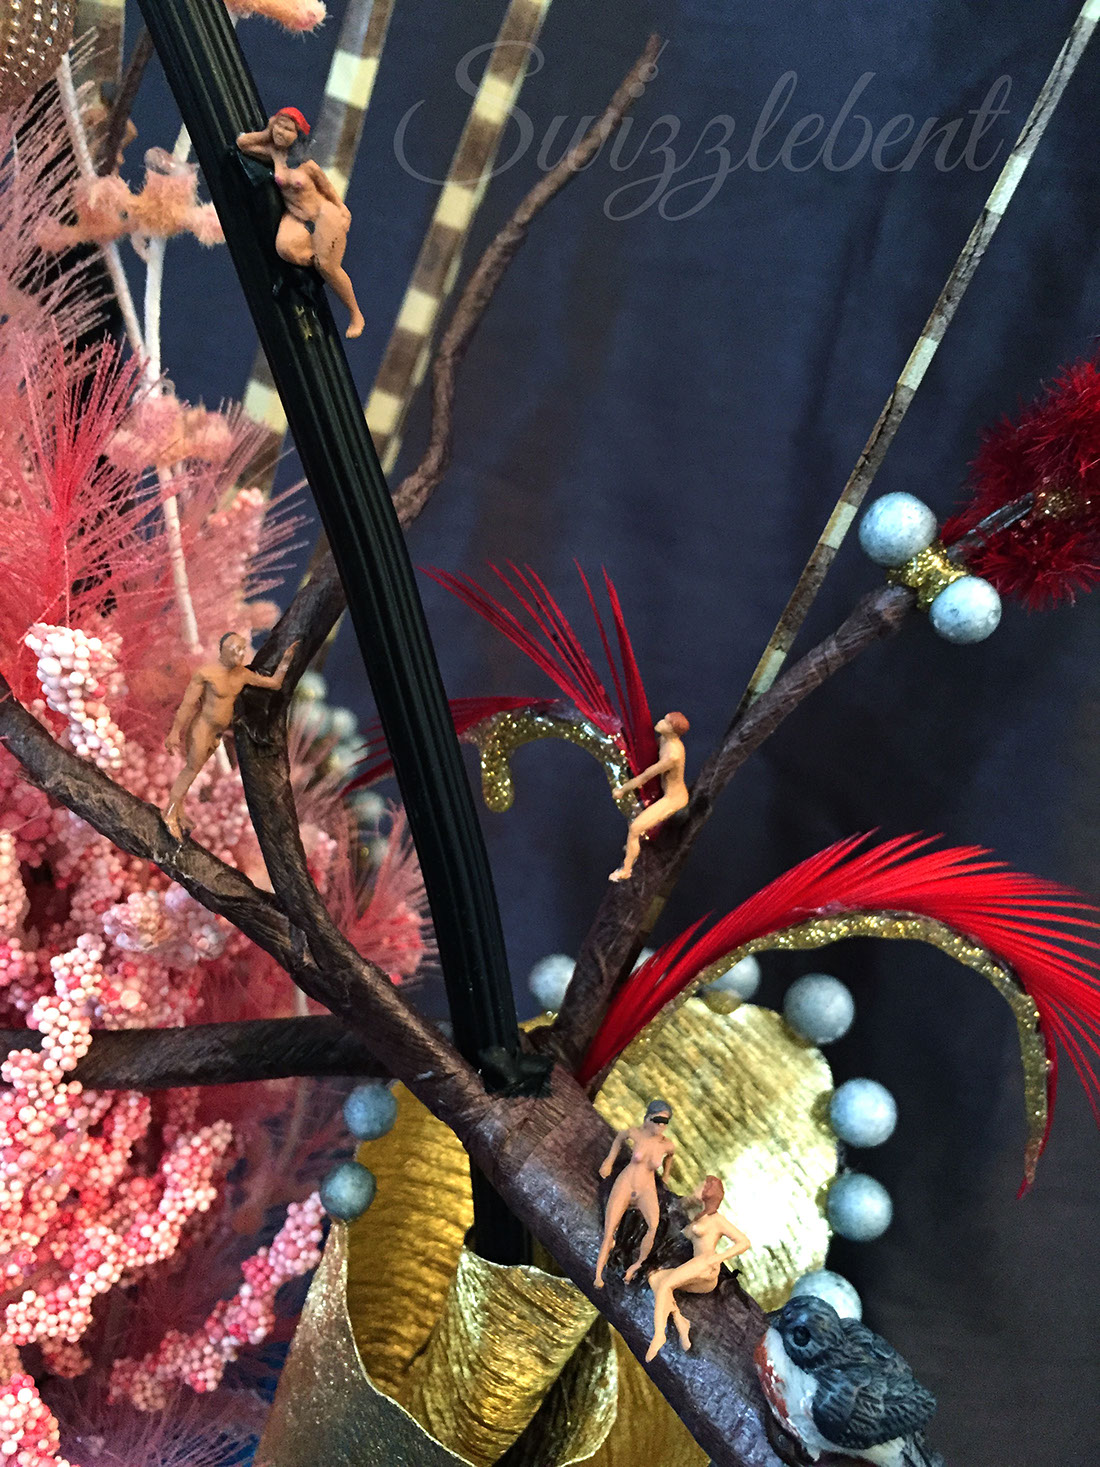
Since this thing is probably going to take some abuse while being worn, real wood from a real tree wasn't going to be sturdy enough to use for the cross branch so I decided to build it out of floral wire wrapped in brown floral tape. Trying to get the branches in the same configuration as they are in the painting was a bit like navigating a real-life M.C. Escher painting, and had to be attached to the cage in two separate pieces that were joined with glue and tape once in place. It was a tricky process, but the up side is that now that it's in, it's probably the sturdiest part of the whole head piece.
>>>
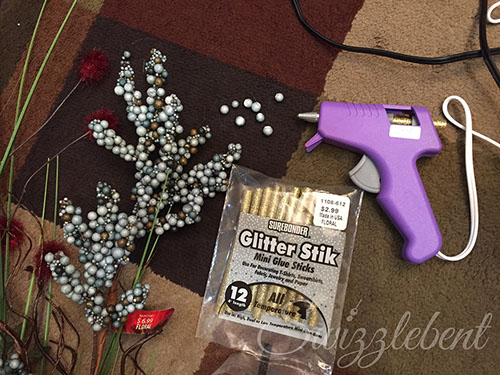
Adding some details to the flower center with pieces from another floral stem snipped, strung, and glued onto white 22-guage floral wire.

<<<
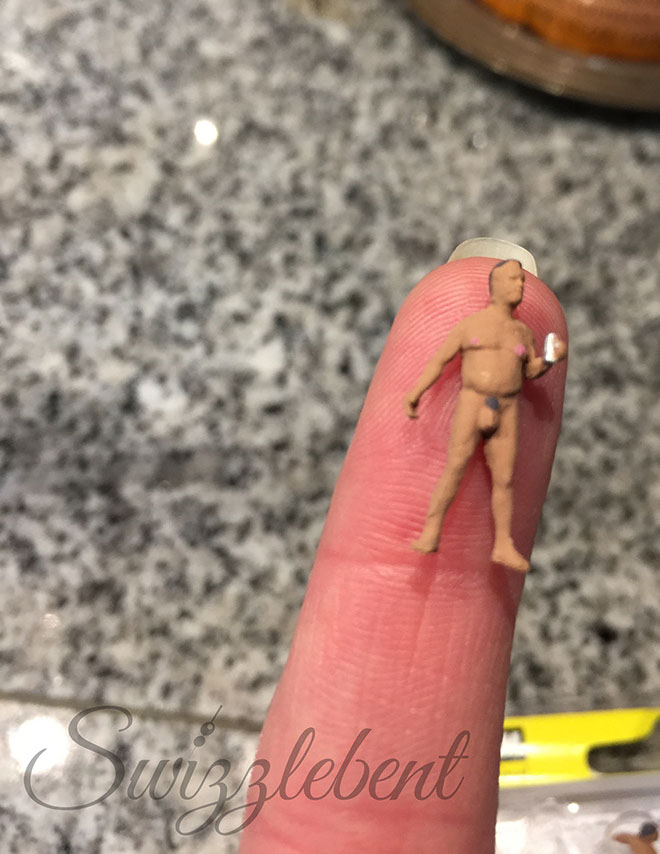
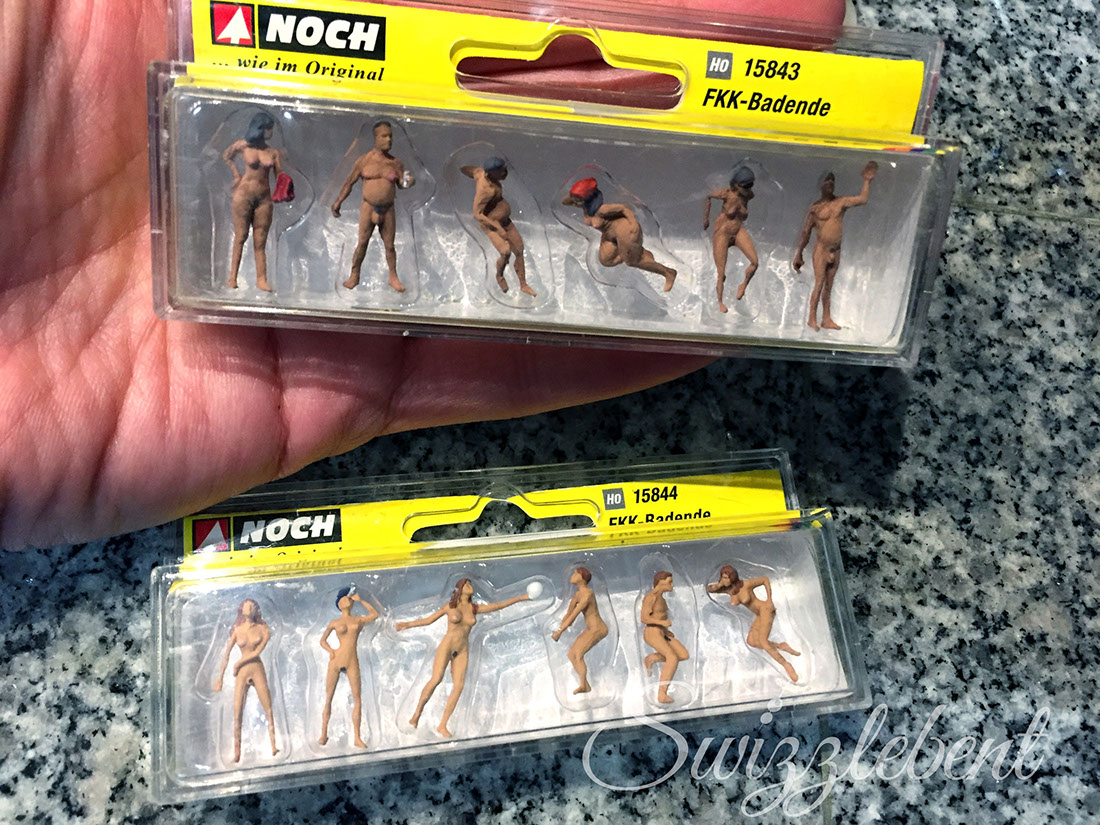
These guys (and gals) are my absolute favorite part of this whole costume. You can't have a Garden of Earthly Delights without the naked little people who inhabit it. I don't really know why these exist, but I am so very grateful that they do.
I added a few more details — birds, leaves, feathers, paint — and ...
... DONE!


NEXT: Costume updates coming soon ...